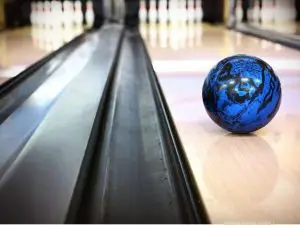
Is your favorite bowling ball acting a bit different lately? It’s probably because its condition may have changed. So what do you think can be a good solution to that? Well, resurfacing a bowling ball helps revive a dead ball. Resurfacing allows the bowling ball to get rid of the build-up and restore its new condition that generally promotes more friction. Once you get your bowling ball back to life using the sanding method, you will be surprised how much your bowling overall performance has improved. So for your convenience, here’s everything you need to know about sanding a bowling ball.
How to sand a bowling ball?
Sanding a bowling ball isn’t actually as difficult as many of you think. To sand your bowling ball you will be needing a few tools— a bowling ball cup, abrasives, water, pads, polishers, and cleaners. If you want to get it done professionally, you can go to a pro shop where there is a bowling ball spinner. But if you want this to be a DIY project, here’s how you can do it.
Step 1:
Decide whether your want your bowling ball to have low or high grit. Do remember, the higher the grits the more polished your ball will look. Similarly, if it has lower grits, the ball will appear less shiny/polished. Do check what grits are recommended by your ball manufacturer.
Step 2:
If you’re doing it yourself, make sure you have all the necessary tools to get the job done. After that is checked, place your bowling ball on the ball cup that acts as a holder to keep the ball steady. Position the ball in a way so that the finger holes are at the top. Remember, you’re going to sand half the ball first (the exposed area), and then flip the ball 180° and sand the other half (the bottom). don’t forget to rotate the ball 90° to sand the sides as well.
Step 3:
Spray on each side of the ball with water before you start sanding it. This reduces the spreading of dust and lowers the heat once the friction between the ball surface and the sanding pad starts. You can spray some water on your sanding pad too if you want. Now, just take the sand disc/pad and start to sand the ball in a circular motion. The general rule is to do it as evenly as possible.
Once the entire ball surface is sanded, you will see all the liquid is gone and the ball is dry again. That’s a good indicator that you’ve sanded the ball in a good continuous fashion. Keep repositioning until the entire ball is sanded. Make sure you put a nice even pressure, not too hard, not too light. Another heads up— do not start moving the pad on the ball if your fingers are still under the pad.
Step 4: Once the sanding process is done using the abrasives/sanding pads, grab a towel and wipe off the dust that is on the ball surface. After this resurfacing process, you should grab a compound or polish for your bowling ball. To apply the compound, use a different pad/towel. Use a microfiber towel to use the compound, and then use another towel/pad to use the polishing agent. Make sure the polishers, compound, and cleaning products are kept near you ready for use. This is because you need to do all the sanding steps as soon as you finish sanding your bowling ball.
If you are a perfectionist, I will say take your ball to a nearby pro shop. They will follow the exact same steps just instead of bowling cup, they will place it on the ball spinner to continue the process more smoothly.
What does sanding do to a bowling ball?
Bowling balls have microscopic pores that create friction. This friction leads to hooking. If you’re an avid bowler you will know how important that is to experience perfect bowling performance. Like the skin on our face, the pores of the bowling ball surface get clogged too. These pores on the bowling ball accumulate oil and dirt that come from the bowling lane, impacting your ball’s performance and turning it into almost useless. Some refer to these kinds of bowling balls as the ‘dead balls’.
Sanding is basically reviving your dead bowling ball and making it all new again. The sanding process resurfaces your ball and gets rid of the build-up that was disrupting its best performance. By sanding your ball, you restore its hook potential, speed, and smooth roll down the lane. I believe, now you can guess, how important it is to sand your bowling ball.
Can you use regular sandpaper on bowling ball?
Technically, you can use sandpaper on your bowling ball. But there are some cons to that. Usually, bowling abrasives are less aggressive than sandpapers. If you use sandpapers on your bowling ball, it will lose its grit faster and the surface quality will be damaged big time. Moreover, abralon pads last longer than sandpapers. You can just dust off the pads and reuse them. But that’s not the case for sandpapers though. Indeed, with every sanding process, the ball loses its longevity. But with sandpapers, it happens way faster. In my opinion, I will suggest using the regular bowling abralon pads instead of sandpapers to be on the safe side. Why risk your bowling ball’s life, right?
What grit should I sand my bowling ball?
Honestly, that is up to you and your bowling ball. One of the most important questions to ask is— do you want your ball to have lower grits or higher grits? A Bowling ball with lower grits gives your ball more surface. A lower grits bowling ball helps it roll on the lane better, especially if the lane is heavily oiled. You can see the best performance if you add speed to your lower grits ball and create fewer revolutions. Oppositely, higher grits bowling balls remove the surface more than lower grits. So what’s the advantage of that? It will help you have more control over your ball, simply because the hook phase is going to be longer when it is on the lane.
Bowling balls usually have finishes like 500/1000/1500/2000 Abralon. So basically you can choose any grit ranging from 500-2000, and even onwards (such as- 3000/5000 grits). If your bowling ball comes in a lower grit, you shouldn’t go too high when you are getting it sanded. But if it already has a higher grit, you can go for a much higher grit. Don’t forget to check the ball’s capacity first and what the manufacturer is recommending. If possible consult with a professional first or your bowling buddies who are well-aware of what you’re thinking of doing.
How often should you sand a bowling ball?
Now that’s a debatable question. Some bowlers like to get their balls sanded as soon as they see there are enough build-ups. If you see your bowling ball has clogged pores with oil and dirt, it’s time to get it resurfaced. What if you have recently sanded your ball? Well, then remember this general rule that most bowlers follow— you should sand your bowling ball after every 60 games. Do keep in mind that excessive-sanding is actually a thing. If your ball has been sanded way too many times that the logo has faded away, it’s time to say goodbye to the ball and get a new one.
Does sanding a bowling ball make it hook more?
The finish of your bowling ball coverstock impacts your bowling performance to a great extent. Do you want your bowling ball to hook earlier as it rolls down the oiled lane? Then bowling ball with lower grits will be a better option for you. Conversely, if you would like your bowling ball to roll further down the lane before it starts to hook, you should go for a bowling ball with higher grits. Therefore, it’s not about whether sanding makes a ball hook more or not, it’s about when it actually starts to hook.
Conclusion
Sanding keeps your bowling ball at its peak because the ball surface is the only thing that touches the lane. It is also the most important thing to keep your ball reaction consistent. So if you sand your bowling ball from time to time, you will always have consistency in your game and no change in performance ever. We have explained everything you possibly need to know about sanding a bowling ball. Now it’s time for you to get in action. Good luck mates!
